Where is the orifice burner on an Amish fridge?

David Jones
Published Mar 19, 2026
Where is the orifice burner on an Amish fridge?
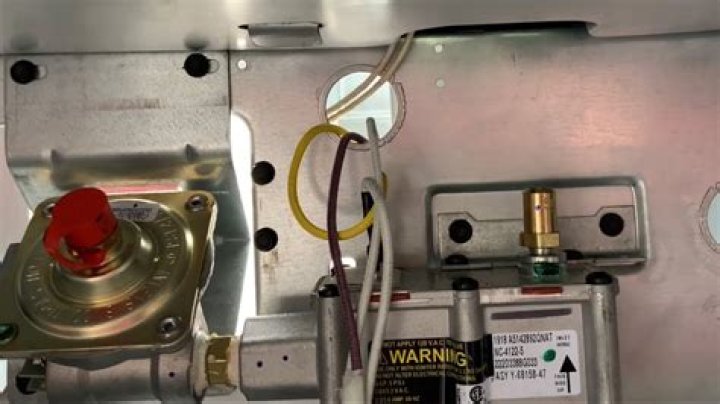
This is the back of my Norcold RV fridge with an Amish built cooling unit, the Dometic version will look slightly different but the location of the fridge orifice burner is basically the same. Location of all the important parts when getting to the fridge orifice to clean it.
What’s the best way to clean a Norcold burner?
Before you can clean the burner, you need to get to it- first, I remove the condensation drain cup, next, remove the sheet metal cover which hides the burner assembly. Now you can see the burner as well as is possible.
How long to soak burner tube in alcohol?
It’s not the recommended route but it actually worked pretty well and the orifice was clean after two hours of soaking. Soak the orifice in alcohol for around two hours. While the orifice is soaking you can clean the burner tube as well using a wire brush and compressed air.
How to reassembly a Norcold camper burner?
Reassembly is just the reverse of disassembly- replace the burner, put the new gasket and orifice on the end of the tubing, and tighten the nut on the tubing in to the burner.
This is the back of my Norcold RV fridge with an Amish built cooling unit, the Dometic version will look slightly different but the location of the fridge orifice burner is basically the same. Location of all the important parts when getting to the fridge orifice to clean it.
Why do I need to Clean my Refrigerator burner?
By looking inside the burner assembly, if you have a blocked component you’ll find dirt and dust that need to be removed in order to effectively ignite and hold a flame.
Where is the orifice on a RV fridge?
The orifice is located behind the outdoor access panel on your RV. The access panel allows you to see the bottom of the RV fridge’s cooling unit as well as the propane burner set up.
Before you can clean the burner, you need to get to it- first, I remove the condensation drain cup, next, remove the sheet metal cover which hides the burner assembly. Now you can see the burner as well as is possible.